This is a collection of tips to allow for WordPress Multi-Host Linux Setup. Using this information, you can easily host multiple WordPress sites on a single Linux server.
Using the Apache2 VirtualHost feature, you can run multiple websites on a single server very easily. Below are a collection of tips to accomplish that.
Each WordPress site runs independently of the others on a single server. So if you’re going to be running a WordPress website on each VirtualHost, it will run as if it’s the only website on the server. This allows you to save costs on additional servers and hardware resources.
Table of Contents
How to WordPress Multi-Host Linux Setup Tips
Domain Hosting
Pick and purchase your WordPress website domain name. Use Google Domains – There is no substitute
Before You Begin
Upgrade your Debian/Ubuntu/Mint Linux Operating System to the most current:
sudo sh -c "apt-get -y update; apt-get -y dist-upgrade; apt-get -y autoremove; apt-get -y autoclean"Install the LAMP Stack
sudo apt install tasksel
sudo tasksel install lamp-server
sudo apt install php-curl php-gd php-mbstring php-xml php-xmlrpc

Setup MySQL
Log in to the MySQL command line as the root user:
sudo mysql -u root
Create WordPress databases:
CREATE DATABASE idisce1_wordpress;
CREATE DATABASE idisce2_wordpress;
Create the database users:
CREATE USER 'idisce1_wpuser' IDENTIFIED BY 'password1';
CREATE USER 'idisce2_wpuser' IDENTIFIED BY 'password2';
Grant the user privileges for their respective database:
GRANT ALL PRIVILEGES ON idisce1_wordpress.* TO 'idisce1_wpuser';
GRANT ALL PRIVILEGES ON idisce2_wordpress.* TO 'idisce2_wpuser';
Exit MySQL:
FLUSH PRIVILEGES;
exit
Secure MySQL
mysql_secure_installation

Modify Apache2 Configuration
Edit /etc/php/7.2/apache2/php.ini
max_input_time = 30
upload_max_filesize = 20M
post_max_size = 21M
Install Multiple WordPress Instances
Create the directories that will host your websites and WordPress source files.
The home directories /var/www/html/idisce1.com/ and /var/www/html/idisce2.com/ are used as an example
sudo mkdir -p /var/www/html/{idisce1.com,idisce2.com}/public_html
Configure Apache Conf for WebSites
sudo a2dissite 000-default.conf
sudo cp /etc/apache2/sites-available/000-default.conf /etc/apache2/sites-available/idisce1.com.conf
sudo cp /etc/apache2/sites-available/000-default.conf /etc/apache2/sites-available/idisce2.com.conf
sudo nano /etc/apache2/sites-available/idisce1.com.conf
sudo nano /etc/apache2/sites-available/idisce1.com.conf
<VirtualHost *:80>
        # However, you must set the variables on the 4 following lines for any further virtual host explicitly.
        ServerName idisce1.com
        ServerAlias www.idisce1.com
        ServerAdmin [email protected]
        DocumentRoot /var/www/html/idisce1.com
        # Available loglevels: trace8, ..., trace1, debug, info, notice, warn,
        # error, crit, alert, emerg.
        # It is also possible to configure the loglevel for particular
        # modules, e.g.
        #LogLevel info ssl:warn
        ErrorLog ${APACHE_LOG_DIR}/error.log
        CustomLog ${APACHE_LOG_DIR}/access.log combined
        # For most configuration files from conf-available/, which are
        # enabled or disabled at a global level, it is possible to
        # include a line for only one particular virtual host. For example the
        # following line enables the CGI configuration for this host only
        # after it has been globally disabled with "a2disconf".
        #Include conf-available/serve-cgi-bin.conf
</VirtualHost>
# vim: syntax=apache ts=4 sw=4 sts=4 sr noet
sudo nano /etc/apache2/sites-available/idisce2.com.conf
<VirtualHost *:80>
        # However, you must set the 4 following lines for any further virtual host explicitly.
        ServerName idisce2.com
        ServerAlias www.idisce2.com
        ServerAdmin [email protected]
        DocumentRoot /var/www/html/idisce2.com
        # Available loglevels: trace8, ..., trace1, debug, info, notice, warn,
        # error, crit, alert, emerg.
        # It is also possible to configure the loglevel for particular
        # modules, e.g.
        #LogLevel info ssl:warn
        ErrorLog ${APACHE_LOG_DIR}/error.log
        CustomLog ${APACHE_LOG_DIR}/access.log combined
        # For most configuration files from conf-available/, which are
        # enabled or disabled at a global level, it is possible to
        # include a line for only one particular virtual host. For example the
        # following line enables the CGI configuration for this host only
        # after it has been globally disabled with "a2disconf".
        #Include conf-available/serve-cgi-bin.conf
</VirtualHost>
# vim: syntax=apache ts=4 sw=4 sts=4 sr noet
sudo a2ensite idisce1.com.conf
sudo a2ensite idisce1.com.conf
sudo a2enmod headers
sudo a2enmod rewrite
sudo a2enmod env
sudo a2enmod dir
sudo a2enmod mime
sudo systemctl reload apache2
sudo apachectl configtest
Create a src directory to hold the WordPress tarball and files:
sudo mkdir /var/www/html/src/
Download and extract the latest version of WordPress to the src folder:
cd /var/www/html/src/
sudo wget http://wordpress.org/latest.tar.gz
Extract the tarball.
To store a backup of the original source files, rename latest.tar.gz to wordpress followed by the date. This will be useful if you install new versions in the future and need to revert back to a previous release.
sudo tar -zxvf latest.tar.gz
sudo mv latest.tar.gz wordpress-`date "+%Y-%m-%d"`.tar.gz
Copy the WordPress files to your site’s public_html folders:
sudo cp -R /var/www/html/src/wordpress/* /var/www/html/idisce1.com/public_html/
sudo cp -R /var/www/html/src/wordpress/* /var/www/html/idisce2.com/public_html/
Give Apache ownership of your WordPress sites’ home directories:
sudo chown -R www-data:www-data /var/www/html/{example1.com,example2.com}/
Set WWW Directory Permissions
Here is an easy bash shell to set ownership and permissions of the www directory structure on a Multiple WordPress support directory structure:
Contents of set_www_permissions.sh
#!/bin/bash
find /var/www/html -type d -print0 | xargs -0 chmod 755
find /var/www/html -type f -print0 | xargs -0 chmod 644
chown -R www-data:www-data /var/www/html
Execute the shell script
sudo set_www_permissions.sh
Test your WordPress Server setup
Verify your WordPress installation by using your Linux Server IP address to load the WordPress installations in your browser:
http://<IP Address>/idisce1.com/public_html
http://<IP Address>/idisce2.com/public_html
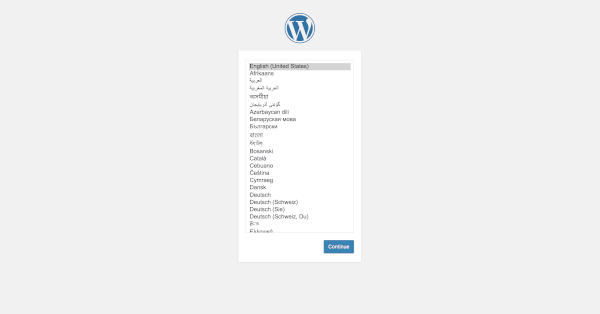
You should see WordPress’ set up page:
Set your Domain to point to your Linux Server
Point and check that your domain is correctly pointed to your server’s IP Address. Or you can spoof the address on your server for further setup and testing by using your /etc/hosts file.
When successful the following 2 sites should work:
http://idisce1.com
http://idisce2.com
You can Now begin configuring your WordPress site using the specific domain addresses.
Gook Luck!
Conclusion
I have used this setup for multiple customers and servers. This collection of steps will allow you to build and support a WordPress Multi-Host Linux Setup. Using this information, you can easily host multiple WordPress sites on a single Linux server. It is straightforward to set up once you master all the moving parts. This is my primary configuration for the support of all my staging sites.
Please be aware that this is an advanced use of WordPress and the design of the Linux server itself. It would be best if you had intermediate to advanced LAMP skills.
Do you Disce? iDisce!